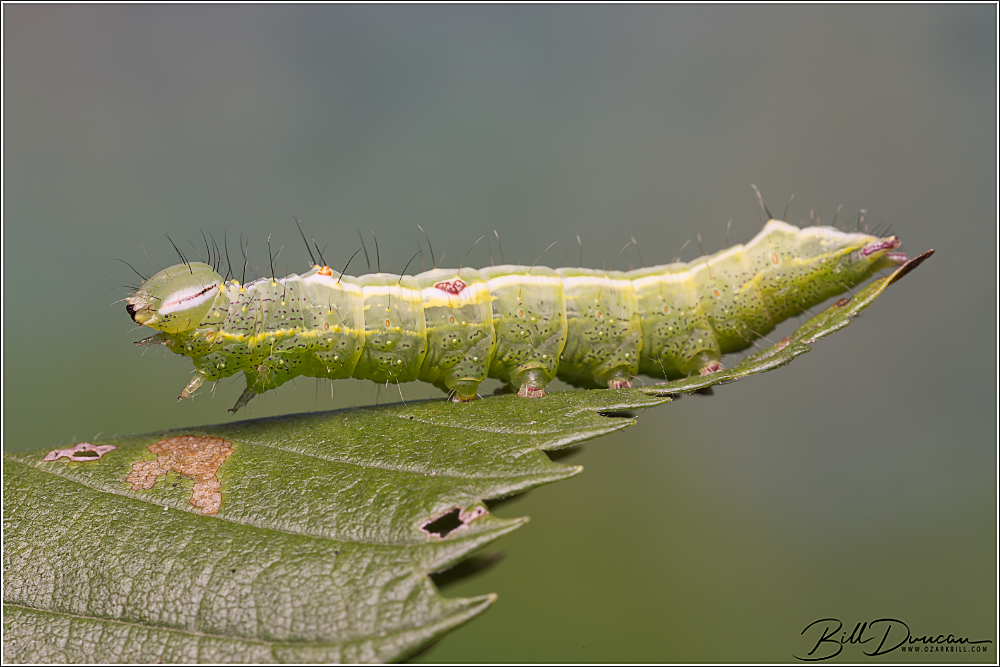
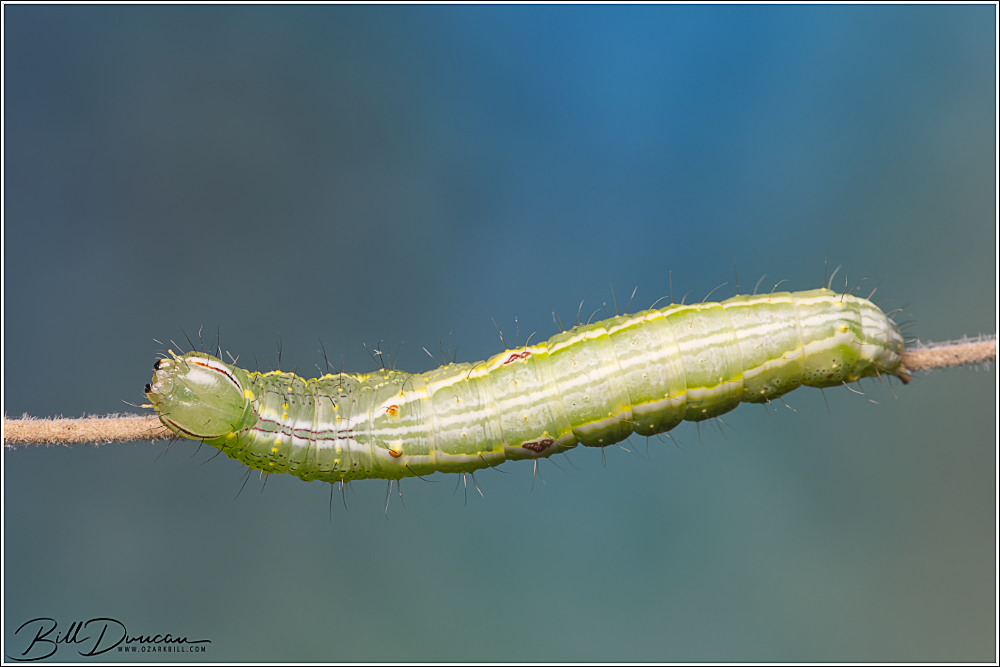
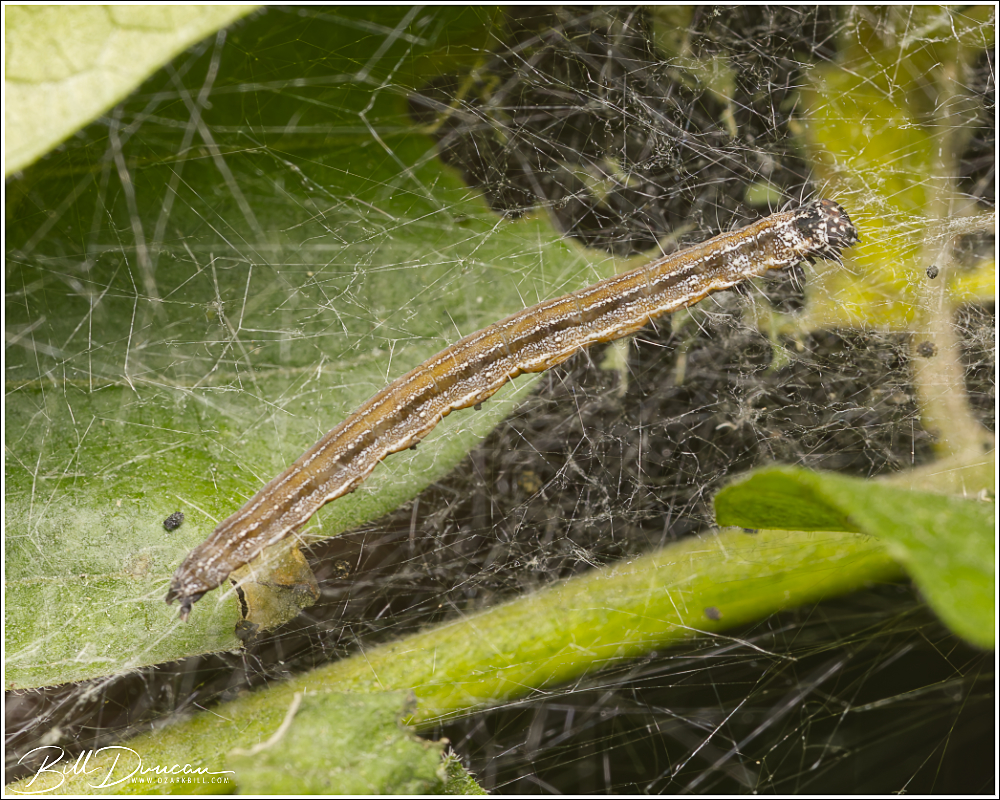
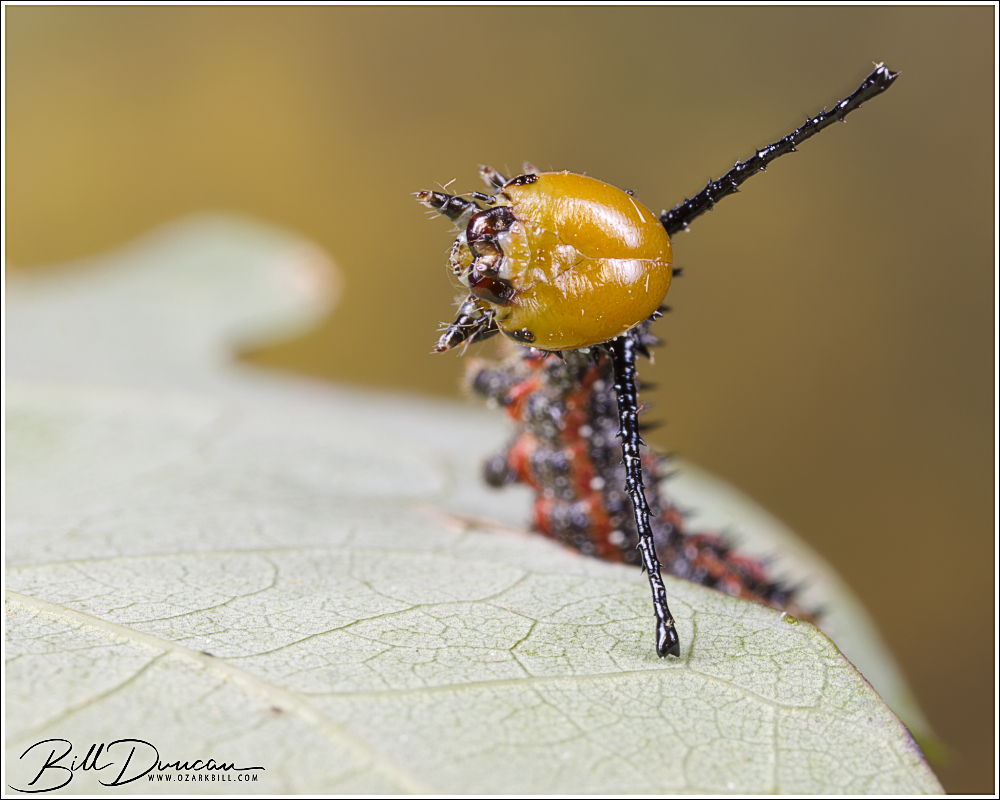
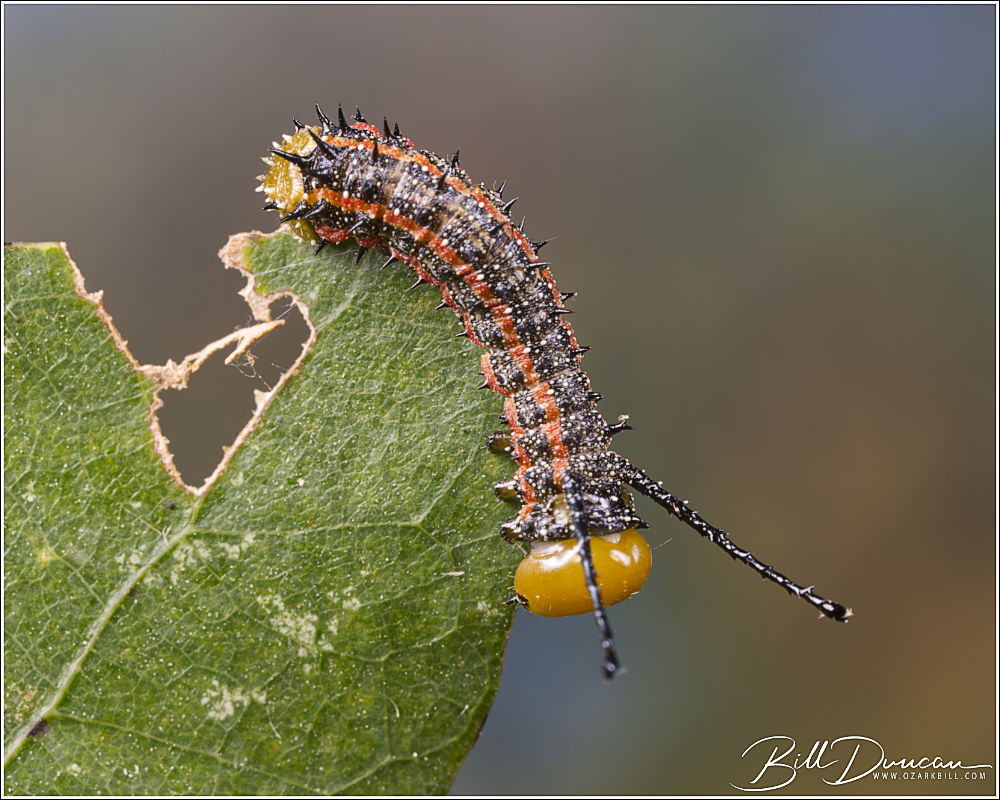
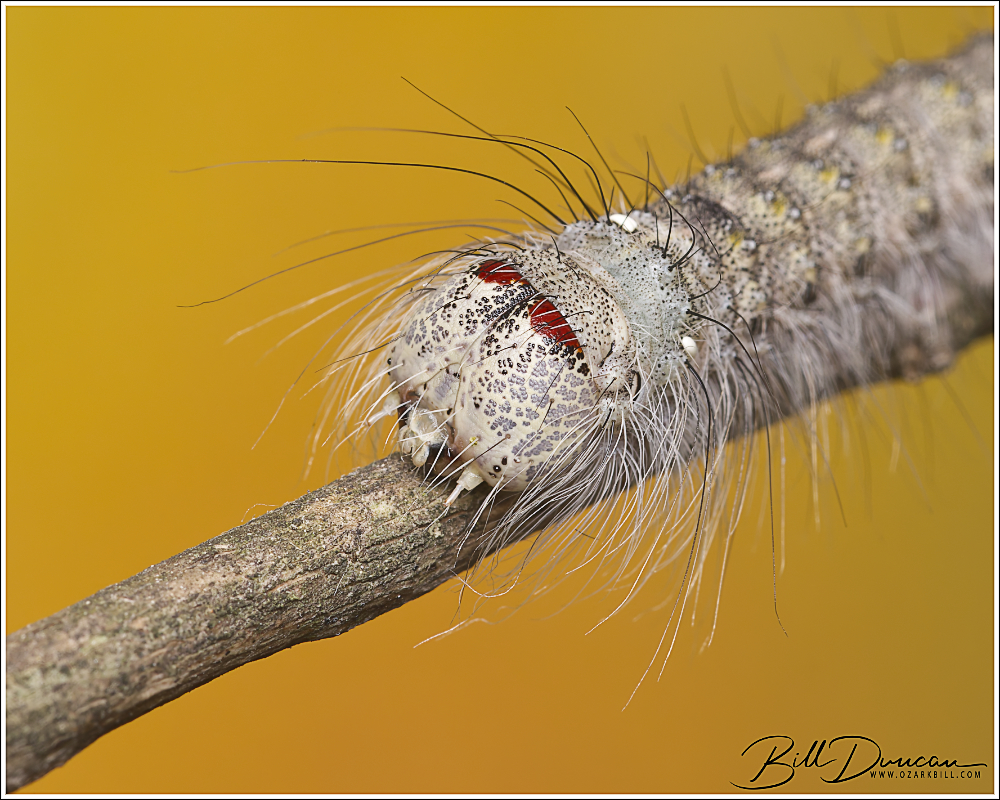
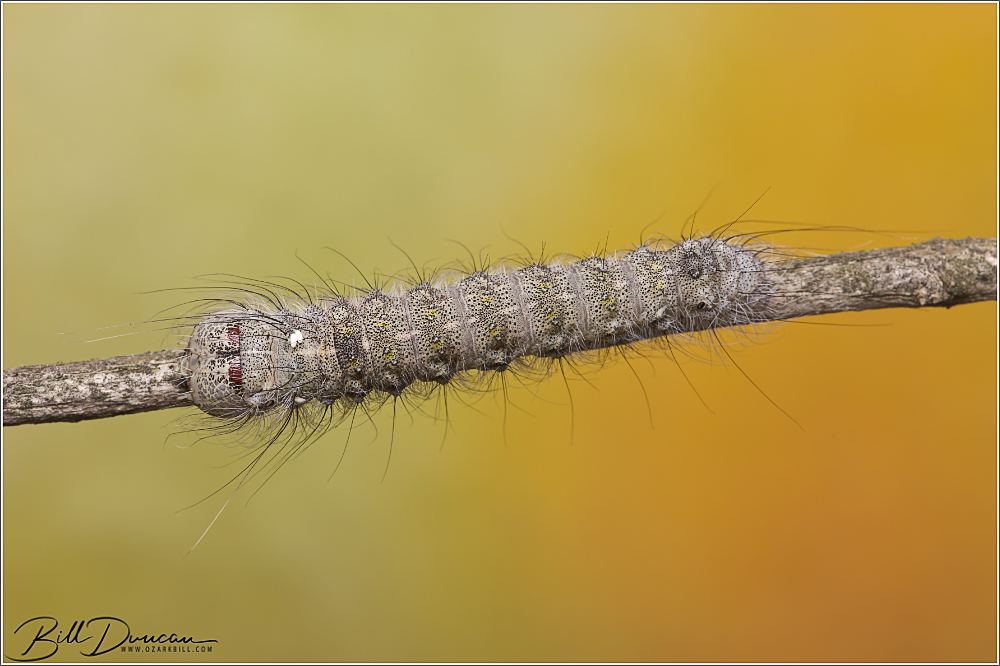
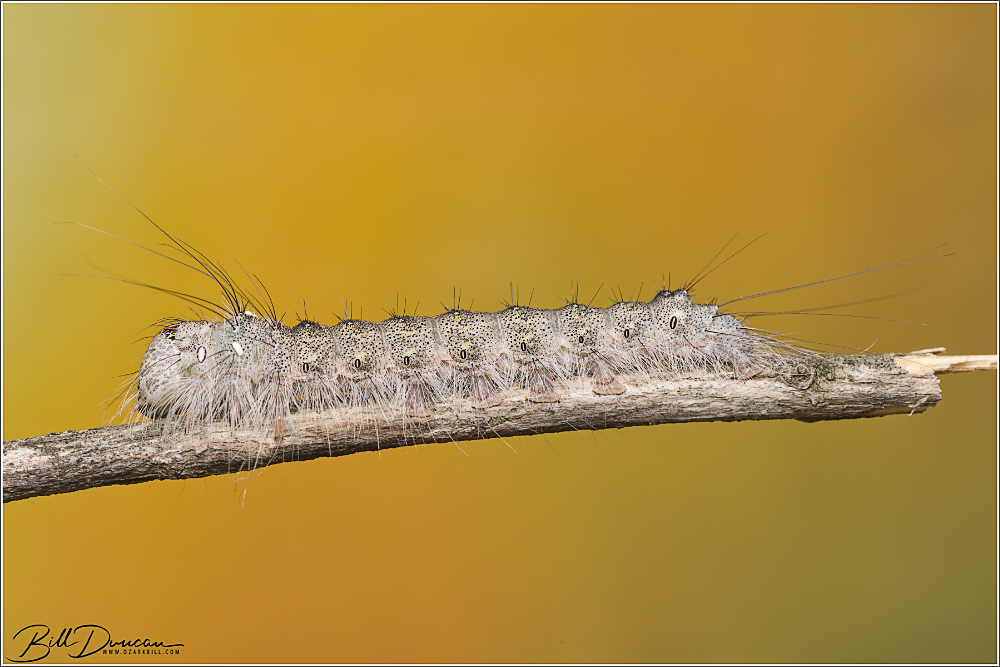
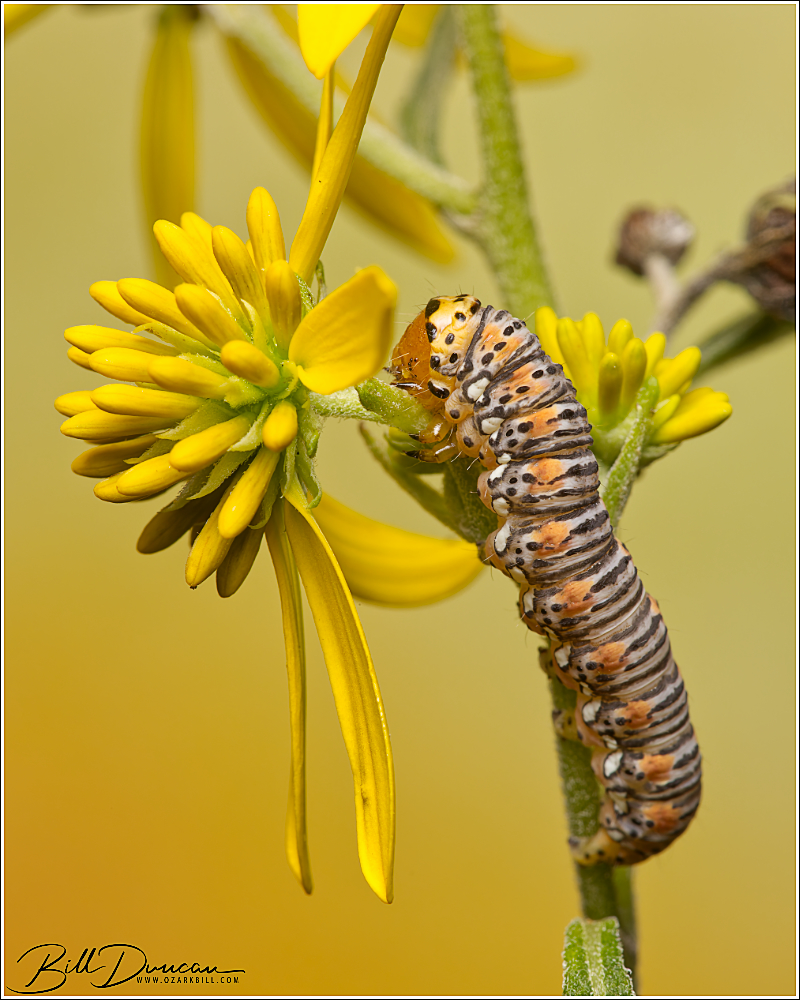
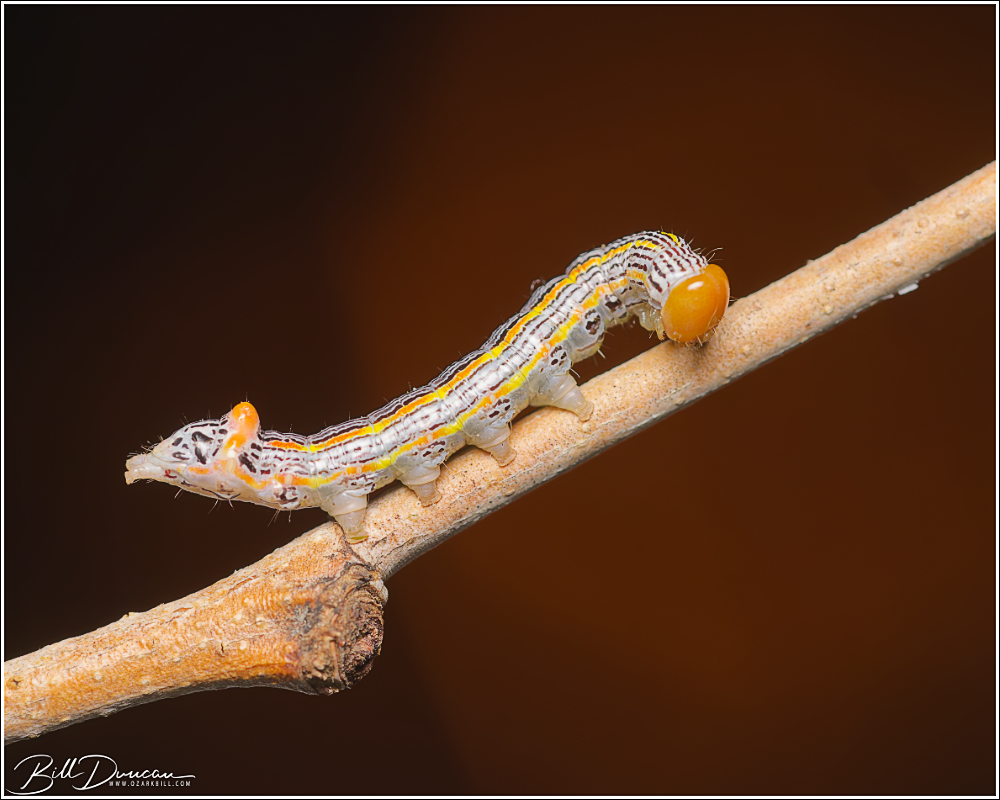
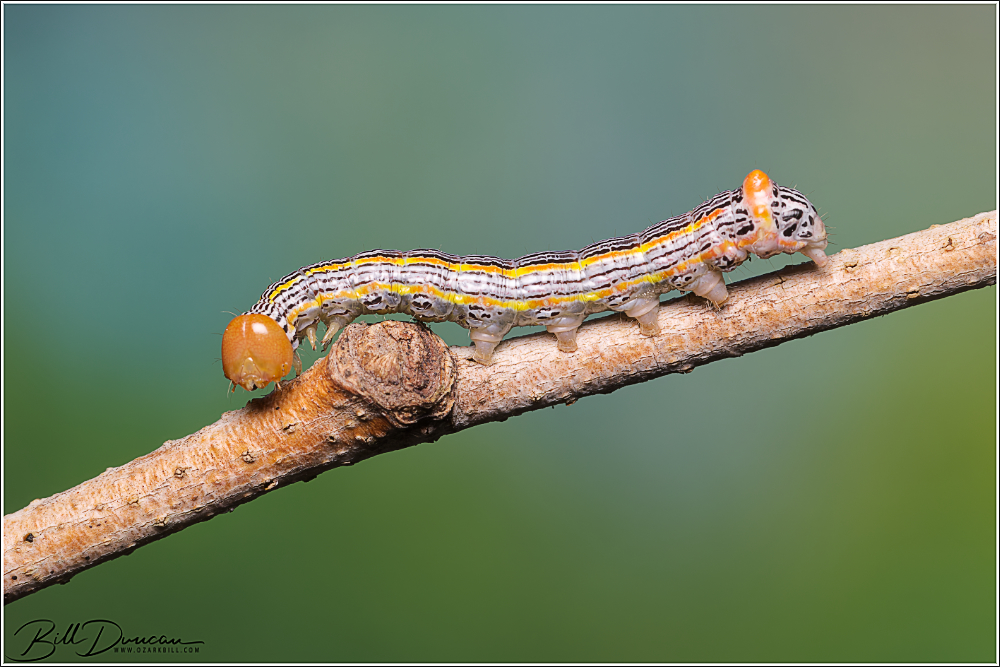
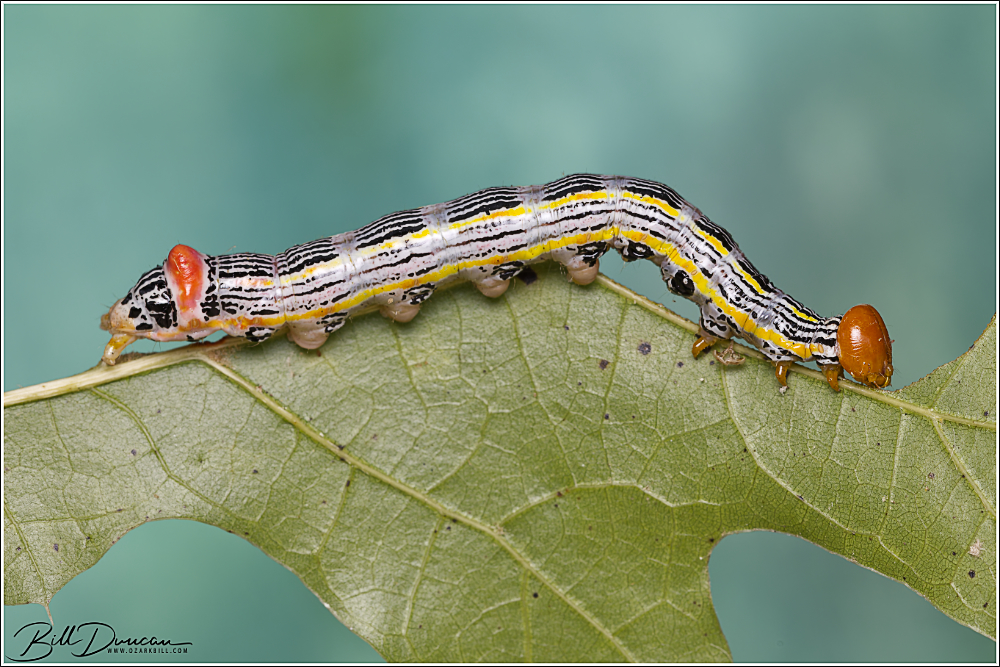
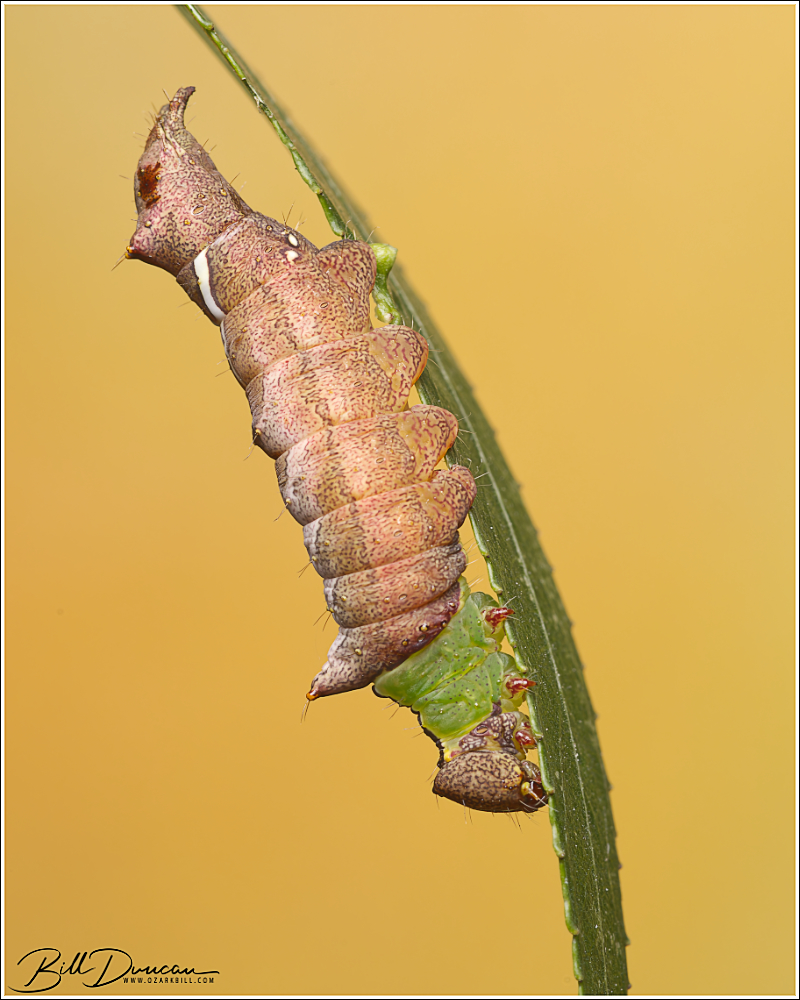
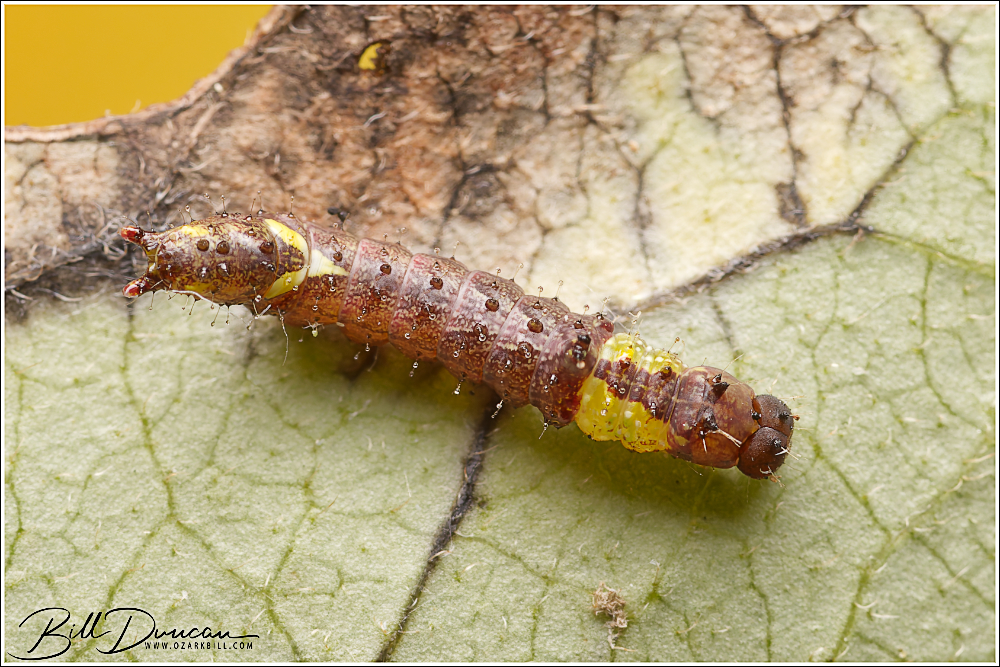
"What a thousand acres of Silphiums looked like when they tickled the bellies of the buffalo is a question never again to be answered, and perhaps not even asked." -Aldo Leopold
Unfortunately, we didn’t have an opportunity to get back to the nest site until late May. When we returned, we found the parents were busy raising four already good-sized chicks. The photography was challenging. We had to contend with the too-speedy traffic of the river road that lied between us and the bluff face where the nest was located and the heat distortion that this blacktop created. There is also the issue of trying to photograph the fastest vertebrate on the planet.
Most often mom would take responsibility of feeding the chicks directly. Dad was primarily the hunter and would drop off prey. Here dad takes some time to piece the prey and feed it to the hungry chicks.
Dad brings a Baltimore Oriole (future Peregrine Falcon) back to the nest.
As typically done, dad would bring the prey back to a spot along the bluff and call for mom. Here mom has just picked up the Oriole and will take the bird to a new spot for processing.
Mom removes feathers from the prey bird on a bluff platform away from the nest site.
Mom begins feeding the impatient chicks.
I suppose at a point of diminishing returns, mom would often take the remains of the carcass away from the nest and would pick the remains to feed herself.
Mom soaring with remains of Oriole.
The female’s favorite perch was this dead cedar that provided great looks at the nest and everything above. The parents would sometimes put up with Turkey Vultures soaring near the nest, but would chase away any Red-tailed Hawks or Bald Eagles. They especially hate eagles getting too close to the nest.Mom has spotted some large bird that has strayed to close to the nest and is about to give them the business.
Miguel and I spent a few hours in the spring and early summer of 2022 photographing a pair of Peregrine Falcons in Madison County, IL during their nesting season. In this first post, the photos were taken in March. There were likely no eggs in the nest at this point and the pair was bonding by the male bringing in food for the female and the two soaring the skies of their territory. It wound up being a pretty dramatic nesting season. Lots more pics to follow.
The male adult Peregrine Falcon sporting identification bands he received while he was in the nest.The female Peregrine Falcon was not banded.The male brings a freshly caught Meadowlark, making obvious vocalizations to make his intentions known.The female picks up the prey and flies to another perch to feast on the nuptial gift.
I know I posted some similar pics last year, but I can’t get enough of these flowers. Although we literally had thousands of these flowers blooming in the yard this year from seed I collected last fall, I didn’t get around to photographing them until on a WGNSS Nature Photo Group trip to Don Robinson State Park in early September.
Forked Blue Curls (Trichostema dichotomum)
These flowers are both tiny and deep in multidimensions. Because of this, a narrow aperture is typically required to photograph with enough depth of field to get all parts of the flower in reasonably sharp focus. However, stopping down the aperture needed for this greater DOF comes with a couple of problems. First, adjusting the aperture too much above f/14 or so begins to dramatically lower sharpness due to the diffraction of the incoming light. Second, and probably more importantly, a small aperture will also bring more of your background into focus. Depending on the closeness and business of the background, this can simply ruin a nice composition.
So, what’s another alternative to stopping down? This flower is a perfect example of when it is a good idea to use focus stacking. In focus stacking, the photographer takes several images at a lower aperture to get “slices” of the subject in focus. Depending on the size of the subject, the focal length of the lens you are using and the magnification you are shooting it at will determine how many of these slices are required to get the entire subject covered. Then, you combine the individual images, or slices, in the computer to hopefully get a perfectly sharp subject with the creamy out-of-focus background that makes a nice image.
Forked Blue Curls (Trichostema dichotomum)
For my macro focus stacking, I typically use a 180mm macro lens and shoot at f/8. Depending on the criteria mentioned above, I will typically need 10-50 images to cover a subject. There are a few ways you can go about taking the images needed for a focus stack. You can shoot them manually, typically taken on a tripod and moving the focus ring a little at a time, or by using a macro focusing rail, which you move your rig closer to the subject for each image. If you are using an autofocusing lens, there are also automated ways to collect the images needed for a focus stack. The one I use is a specialized extension tube that has a computer chip inside. I let the extension tube know what the focal length is of the lens and the aperture I have the camera set to, make sure my focus is just before the first part of the subject I want to focus on and then hit the shutter release. The camera will then take image after image, changing to a deeper focus with each one until either I feel I have covered the entire subject or the lens hits infinity. Finally, newer cameras allow you to focus stack using controls built into the camera’s software. These typically provide a wide range of options for the photographer to control. I imagine using this has somewhat of a learning curve. I have not used this in my Canon R5, partly because I like the simplicity of what I use and partly because you cannot use flash when using this feature in Canon cameras to date.
If you’re having troubles getting the types of images you want of small subjects under high magnification, give focus stacking a try. But, remember, your subjects need to be stationary!
This was sort of an impulse purchase. I couldn’t believe I found this at a local nursery, and loving this species, I had to try it at home. I installed this in the front wildflower bed of our yard. I know that I’ll definitely have to keep this one sprayed for its protection as it is literal deer candy. The deer ate half of this inflorescence shortly after I took this photo.
I can’t help but to marvel at this grand post oak every time I visit Victoria Glades in Jefferson County, MO. I’m always hoping to be there in good light and skies to take a worthy photograph of it. On a morning of a WGNSS Nature Photo Group field trip, I arrived a little early with this in mind. Not an interesting sky, but I used the bright sun to my advantage to create a starburst.
A regal fritillary (Speyeria idalia), photographed at Friendly Prairie, feeding on Asclepias tuberosa, one of the only species in bloom at the time of our visit.
Back in late June, Miguel and I took a trip to the “Cole Camp Prairies” near Sedalia MO. Here, we were after a target I had long wanted to photograph, the regal fritillary butterfly (Speyeria idalia). Once abundant across the ancient prairies, lands that are now mostly used to grow the crops feeding us, the regal fritillary are now listed as a G3/S3 species, meaning they are vulnerable to extinction. The reason for this is that the regal fritillary host plants are violet species that only grow in the scarce remnants of the once vast ocean of prairies that covered much of the central United States. Fewer acres of prairie means fewer prairie violets that leads to fewer butterflies. Fortunately, the pitiful amount of prairie remnants left in the Show-Me State do still support this fantastic butterfly and Miguel and I did our best to find and photograph some.
A male Dickcissel, photographed at Friendly Prairie, claiming his territory.A Dickcissel, photographed at Friendly Prairie with a captured prey, likely destined to feed a chick in a nearby nest.
The Cole Camp Prairie complex is a list of approximately eight mostly postage-stamp sized publicly accessible prairies located north of the small town of Cole Camp in Benton County. I did some research to find out which prairies had confirmed sightings in the previous years and which were more likely to have a sizeable population. I knew we would focus on these, but because these prairies are pretty close to one another, we wound up visiting seven locations just to see the differences between them and to give the entire area a good scouting for the regals.
Photographing a butterfly on the wing is no easy task! A regal fritillary (Speyeria idalia) male searches for one of the first females to emerge at Paint Brush Prairie.
Our first stop was at Paint Brush Prairie Conservation Area. This is one of the larger of the Cole Camp Prairies and was reported to hold one of the better-sized populations of regals. Our visit coincided with the early portion of the regals flight period and this would hold ramifications that would complicate the achievement of our goals. Here, we did find an estimated two dozen regals. However, these were all most likely males that typically emerge earlier than females. Although some plants were in bloom, these males were not interested in feeding. Instead, they were constantly cruising, inches above the vegetation, assumedly waiting for one of the first females to emerge and an opportunity to mate. We tried our best. Once in a while, one would stop to rest for a brief second or two, but it was never long enough to get in position, find focus and take the shot. I then tried to see if it was possible to photograph them in flight. This proved to be about as fruitless as it sounds. After hundreds of shots, I wound up with only a single keeper, pictured here.
A regal fritillary (Speyeria idalia), photographed at Friendly Prairie, feeding on Asclepias tuberosa, one of the only species in bloom at the time of our visit.
Our next stop, just a quick drive west, was at Friendly Prairie C.A. This wound up being our most successful stop. Success in photographing these beasts lies in your visit’s timing with flowering plants. In late June, we missed the prolific blooming of most of the Echinacea and Asclepias and were a tad too early for the blooming period of the native Cirsium that support the energy needs of these butterflies over mid to late summer. Thankfully, we did find a few Asclepias tuberosa at peak bloom and the regals had found them as well. We only found four regals here, but they were cooperative indeed!
Miguel, ready for action at Friendly Prairie C.A.
A Halloween pennant photographed at Hi Lonesome Prairie. Notice the parasitic water mites that dragonflies often carry on the bottom of its thorax.
We continued our tour of the Cole Camp Prairies, visiting the holdings that the Missouri Department of Conservation had to offer as well as one restoration property owned by The Nature Conservancy. Towards the end of our time, we stopped at the largest prairie parcel in the area – Hi Lonesome Prairie C.A. This prairie was very dry and, perhaps consequentially, we found very few plants in bloom. There were, however, still a number of butterflies. Here we found monarchs and a diversity of swallowtail species as well as five regals. Almost all of these were flitting around the bushes that spotted the prairie’s many hillsides. This prairie also held some nice bird diversity. In addition to the ubiquitous Dickcissel, we found Grasshopper Sparrows, Henslow Sparrows, and Bell’s Vireos. Around a couple of this area’s large ponds, dragonflies were in abundance as well. I took some time to hop the electric fence around the larger pond, finding out the hard way that it was indeed working to keep out the cattle that graze the prairie, and spent some time working with gorgeous Halloween pennant’s (Celithmis eponina). See attached photo.
A regal fritillary (Speyeria idalia), photographed at Friendly Prairie, feeding on Asclepias tuberosa, one of the only species in bloom at the time of our visit.
I had wanted to give the Cole Camp Prairies a good tour for quite a while. I’m happy that we spent the day doing this although I know it was but a snapshot over the course of the seasons. Finding the number of regals we did was thrilling and I’m happy to have gotten a few worthwhile photos from the day. Although these prairies are a good hoof from the StL, at a little less than a three-hour drive, they are still much easier than getting to other prairies in different parts of the state. Hopefully my next visit comes soon.
I’m calling this striking bird a juvenile male Blackpoll Warbler. Feel free to let me know if you disagree. Found on May 22, 2022 at Little Creve Coeur Ecological Area.
The Pacman Nebula (NGC 281) The Pacman Nebula is a large emission nebula that is approximately 48 light years across and nearly 9500 light years from earth. It was named for its resemblance to the popular Pac-Man character in video games, although you’ll probably have to use your imagination to see this in my image (Pac-Man is facing towards the top of the image). Unlike the the popular Namco mascot, this Pac-Man does not gobble up dots, it is actually creating them; NGC 281 is a star forming region that lies near the constellation Cassiopeia.
Collecting the data Miguel, who is now getting serious into deep sky object (DSO) photography, and I met at what is now my favorite location for this work – Danville Conservation Area in Montgomery County, MO. This is classified as a Bortle 4 sky location and we were working under near perfect conditions of a new moon, no clouds, low winds and cool temps (mid to low 40s). Selecting a great night was one of the successes of this project. Miguel was just beginning to work on his new rig, attempting polar alignment for the first time and trying out his more sophisticated system of go-to and guiding. I use a simple unguided star tracker and the camera gear I use for normal daytime photography and had my target in mind and planned a night of imaging.
The photographer’s kit used in this project.
Gear used Canon 7d mkii, 300mm f/2.8 lens is mki, Sky-Watcher Star Adventurer tracking mount with extra counterweight balance, Bahtinov focus mask, red-light scope, heat packs used for prevention of dew formation on lens, all setup on a sturdy Gitzo carbon fiber tripod and anchored to a concrete block.
Imaging details Lights: Approximately six hours with 30 second subs (manually removed obvious bad subs and used 512 subs for integration. Darks: 32 darks captured in field after imaging Flats: 40 flats taken the next day from home Bias: 67 bias images
Processing Image shown here was stacked using Sequator. Stacked file was processed in PhotoShop CS6, manually following processes described in various YouTube videos. See below for details learned from this processing session.
Problems and learnings This was a good night but definitely not perfect. Again, I struggled with getting proper polar alignment. My main issue was not identifying Polaris, necessarily, as we were easily able to find it with our naked eyes. The problem came from being able to correctly identify the star while looking through the reticle. Ultimately, I picked the most likely candidate and went with that. I didn’t have much star trailing in my 30 second subs, so I think I did an OK job. I did notice that the tracking was off and I had to recenter the target about once an hour, but that is due to using an unguided tracker and the weight of my rig. This is something I’ll just have to remember to do with future objects.
William Optics vixen style base mount. A must have!
I have picked up a couple pieces of gear that will dramatically help with achieving proper PA on future projects. First, I purchased a green laser pointer that I can shoot directly through the reticle and line up perfectly with Polaris. More importantly, I finally picked up a new wedge/base mount to support the tracker. This is the piece that is critical in getting proper PA. The mount that comes with the Sky-Watch Star Adventurer is severely lacking in many ways and is frankly a POS. The William Optics model I now have (see photo) is all metal, allows for more precise control in declination and is much easier to control right accession with. The differences are like night and day! I didn’t have these two things for imaging NGC 281, but I have them now and tried them in the yard one night and achieved perfect polar alignment in less than 15 minutes! I feel much less anxiety about this step now and wish I hadn’t waited so long to pick up this base mount.
The biggest mistake of the night was something I was aware of but simply forgot to handle. I left the settings for auto orientation on in the camera. This means, as the mount tracked the object over the course of the night, about half of my images were in the horizontal orientation and half of them were in the vertical orientation. This is a much bigger problem than it seems. In most software, you can change the orientation of an image with a simple mouse click. However, the orientation is actually embedded in the exif data of your RAW files. I came to find out that most stacking programs will not orient all of the files for you and, therefore, I was losing half of my light subs in the stacking process. It is possible to change the exif data to make them all the same, but this requires computer skills that I simply do not have. Thankfully, Sequator did accept all of my subs, but it is not the best software for stacking DSOs. I would love to fix this in the data I have collected for NGC 281 and be able to stack in Deep Sky Stacker or ASTAP one day, but I will definitely remember to turn this function off in camera in the future.
Processing after stacking was the usual barrel of fun. I found it a little easier than I did for M31, but I think I have a long way to go. I was hoping to get much more detail in NGC 281. I think I had ample integration time and feel there may be some detail I can pull out with better processing. Maybe the fault lies in my images themselves and I could do better with PA and tracking. It might also have to do with the focal length. With the 480mm focal length equivalent used for this object, I don’t have much more opportunity to improve here, but I could have used a 1.4x teleconverter and get 672mm focal length equivalent. I think there was room to do this with this object, but I would have had to recenter more often and lost some light gathering in the process. Maybe next year!
The author setting up for a night of imaging. Photo by Miguel Acosta.
Conclusions Despite the final outcome, which I am satisfied with, this was a lot of fun. I’m finding that I can have fun doing almost anything as long as I am outside. This is getting truer all the time. Although this process has its frustrations and anxieties, I guess you can call that a “good stress.” I’ll always remember the pair of Barred Owls squawking away at each other and the coyotes howling and barking on at least three sides from where Miguel and I worked. In addition, while I was breaking down at about 3:00 am, two armadillos noisily burst through the grasslands, coming up to within ten feet of me to see what I was doing.
My hope is to continue this and image one object a month. I think I can sacrifice one good night’s sleep a month for such experience, learning and memories.
Miguel and I found an aggregation of the catalpa sphinx moth caterpillars on a caterpillar hunt in early September. I have been looking for this species for a while so this was a nice find. Of the ten or so we found, one was infested with the parasitoid braconid wasp cocoons. See photos below.
Photos taken of a Lesser Scaup hen taken from my canoe in Ellis Bay at Riverlands Migratory Bird Sanctuary in May, 2022. Due to the large area of white on the face and the lack of white wing bars in the primary flight feathers, I feel reasonably confident in calling this bird a Lesser Scaup, but please let me know if you have evidence to suggest otherwise.
Female Lesser Scaup
The white wing bars stopping at the primaries suggests this is a Lesser Scaup hen.