"What a thousand acres of Silphiums looked like when they tickled the bellies of the buffalo is a question never again to be answered, and perhaps not even asked." -Aldo Leopold
I’m finally getting around to posting photos of some Leps that were taken during the WGNSS Nature Photography Group’s quite enjoyable visit to Prairie Garden Trust located in Calloway County, MO. I can’t express how much I appreciate this location and the people that manage it. Lorna and Henry Domke gave our group a personal walking tour around much of their fabulously managed naturescapes – in my opinion the perfect exemplar of how and why to manage natural areas. I thought I would have been back by now, but time has a way of moving too fast and there’s only so many weekends in the year.
Delaware Skipper (Anatrytone logan)
Text from their website:
Vision
What the PGT will become
The PGT is a gem of a nature garden in central Missouri where people enjoy strolling by woods with large old trees, prairies filled with a mix of native wildflowers, and ponds and streams rich in native aquatic life. It is free of exotic, invasive plants and animals. Visitors are inspired there to learn about and take better care of nature.
Zebra Swallowtail (Protographium marcellus)
Mission
What we do
The Mission of the PGT is to inspire people by letting them experience the beauty of nature found in a variety of enhanced native habitats on the PGT property.
Values
What we believe
Native plants are good for healthy habitats, while invasive, non-native plants are detrimental and should be removed.
We believe that knowing what plants and animals exist here and how they change over time is valuable. We want to avoid harvesting natural resources on the property for income so mature habitats can develop here.
We support removing plants (using fire, herbicides and mechanical means) and animals (by trapping or hunting) as needed for the management of a beautiful habitat and to maintain the balance of nature, but not as a source of income or recreation.
We believe that quiet personal experiences in nature enhance well-being and that crowds detract from that.
Hummingbird Clearwing (Hemaris thysbe)
We believe that unmanaged habitats tend to be messy, but they can be made more visually appealing by following an artistic landscape design. By having some areas of the PGT less tended and other areas along trails more tended, we offer a nature garden within a natural area.
We believe that knowing the natural, geologic and cultural history of the PGT property is of value. It’s where a coral reef developed 360 million years ago, where the Ozark hills meet the glaciated plains, where native Americans hunted 2000 years ago and where settlers built a thriving pottery almost 200 years ago.
I know I posted some similar pics last year, but I can’t get enough of these flowers. Although we literally had thousands of these flowers blooming in the yard this year from seed I collected last fall, I didn’t get around to photographing them until on a WGNSS Nature Photo Group trip to Don Robinson State Park in early September.
Forked Blue Curls (Trichostema dichotomum)
These flowers are both tiny and deep in multidimensions. Because of this, a narrow aperture is typically required to photograph with enough depth of field to get all parts of the flower in reasonably sharp focus. However, stopping down the aperture needed for this greater DOF comes with a couple of problems. First, adjusting the aperture too much above f/14 or so begins to dramatically lower sharpness due to the diffraction of the incoming light. Second, and probably more importantly, a small aperture will also bring more of your background into focus. Depending on the closeness and business of the background, this can simply ruin a nice composition.
So, what’s another alternative to stopping down? This flower is a perfect example of when it is a good idea to use focus stacking. In focus stacking, the photographer takes several images at a lower aperture to get “slices” of the subject in focus. Depending on the size of the subject, the focal length of the lens you are using and the magnification you are shooting it at will determine how many of these slices are required to get the entire subject covered. Then, you combine the individual images, or slices, in the computer to hopefully get a perfectly sharp subject with the creamy out-of-focus background that makes a nice image.
Forked Blue Curls (Trichostema dichotomum)
For my macro focus stacking, I typically use a 180mm macro lens and shoot at f/8. Depending on the criteria mentioned above, I will typically need 10-50 images to cover a subject. There are a few ways you can go about taking the images needed for a focus stack. You can shoot them manually, typically taken on a tripod and moving the focus ring a little at a time, or by using a macro focusing rail, which you move your rig closer to the subject for each image. If you are using an autofocusing lens, there are also automated ways to collect the images needed for a focus stack. The one I use is a specialized extension tube that has a computer chip inside. I let the extension tube know what the focal length is of the lens and the aperture I have the camera set to, make sure my focus is just before the first part of the subject I want to focus on and then hit the shutter release. The camera will then take image after image, changing to a deeper focus with each one until either I feel I have covered the entire subject or the lens hits infinity. Finally, newer cameras allow you to focus stack using controls built into the camera’s software. These typically provide a wide range of options for the photographer to control. I imagine using this has somewhat of a learning curve. I have not used this in my Canon R5, partly because I like the simplicity of what I use and partly because you cannot use flash when using this feature in Canon cameras to date.
If you’re having troubles getting the types of images you want of small subjects under high magnification, give focus stacking a try. But, remember, your subjects need to be stationary!
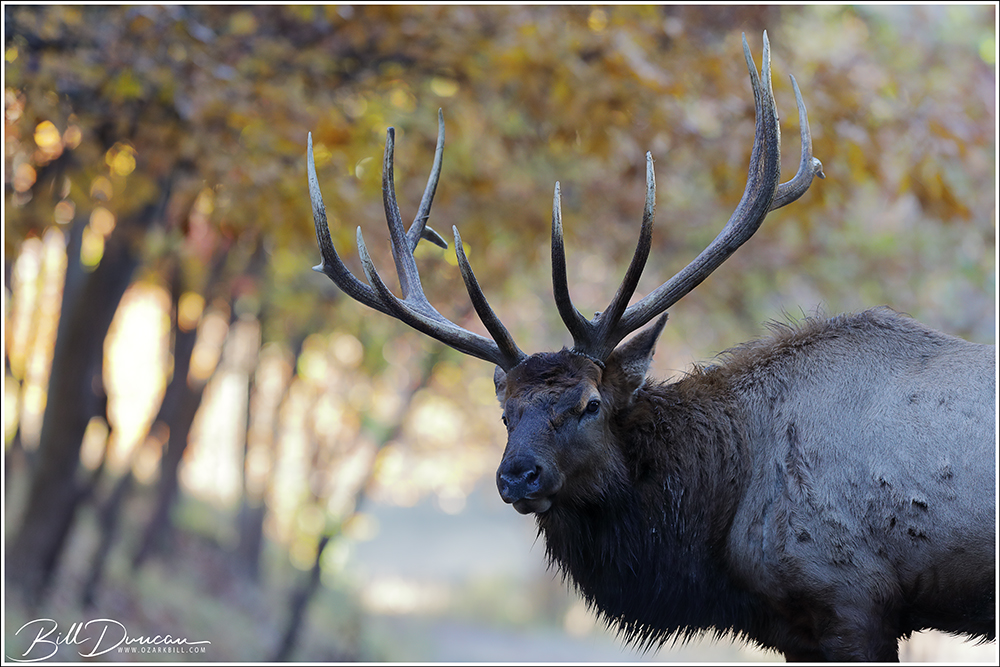
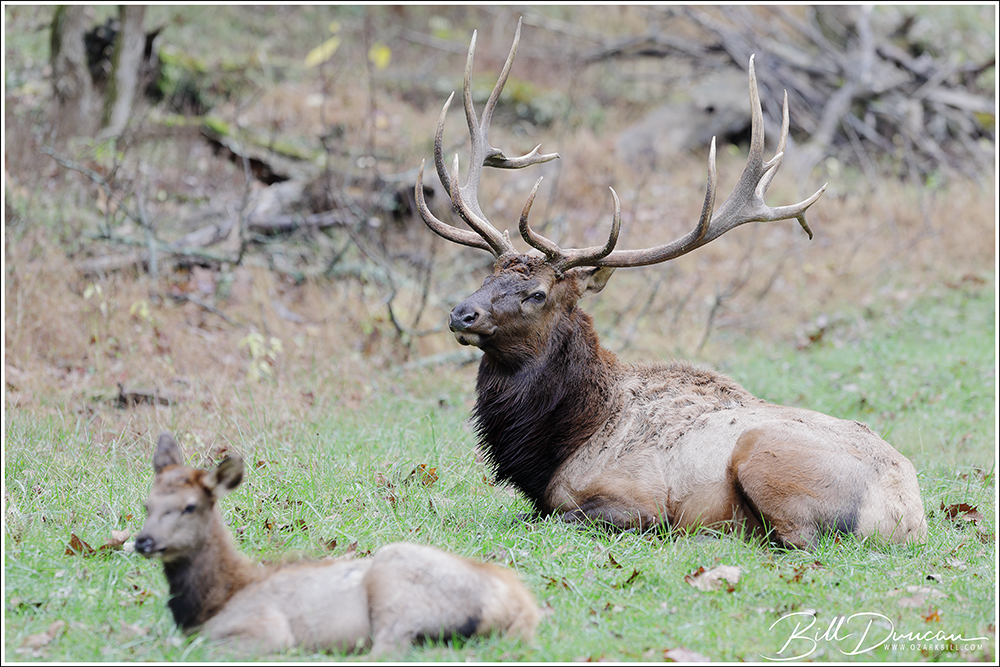
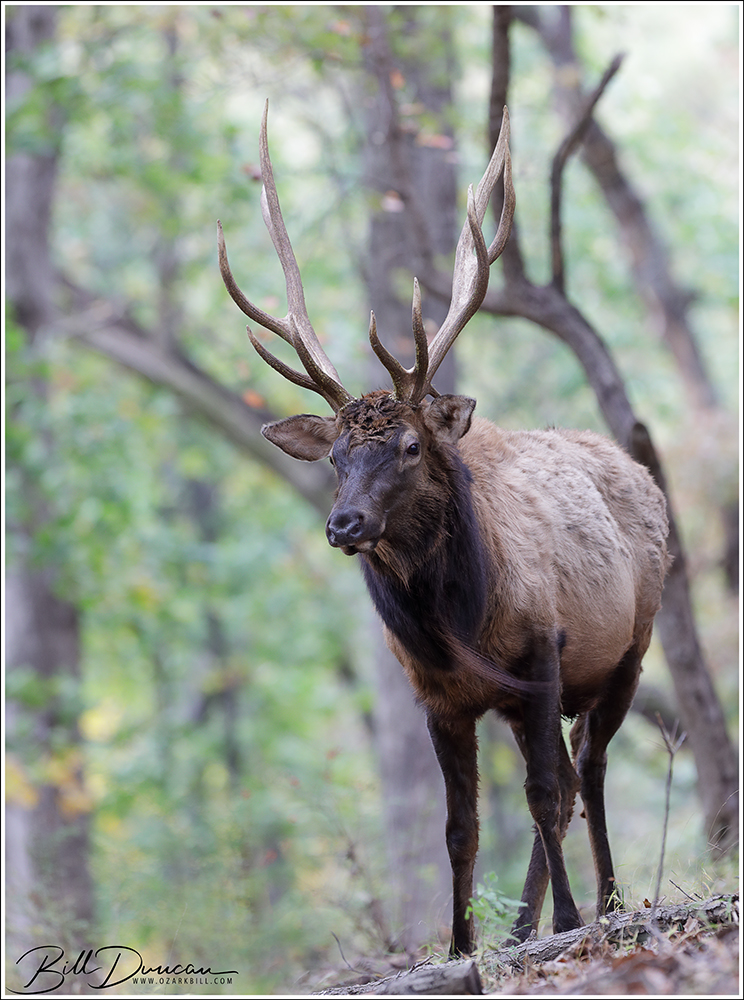
The dominant bull of the park gives a glance to the group of photographers has he roams his ground.
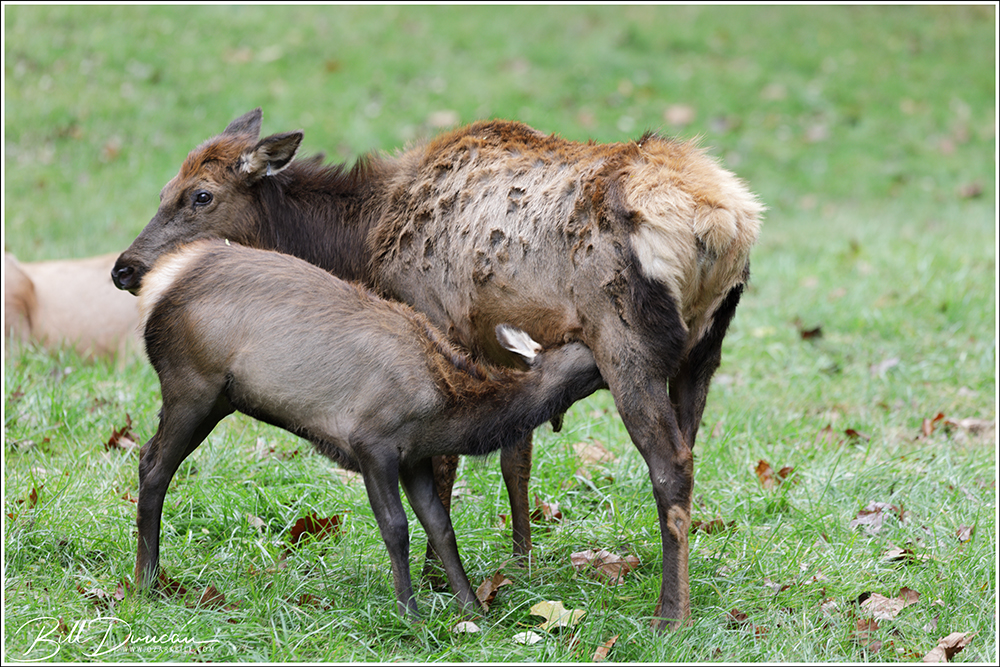
On a crisp and beautiful autumn morning this past Halloween, the WGNSS Nature Photo Group group enjoyed the rare occasion of visiting a relatively close St. Louis County location. Part of the St. Louis County Park system, Lone Elk Park has contained herds of elk and bison in some fashion since the original introduction in 1948. This is a beloved park that offers visitors up close looks at bison, elk, deer and other wildlife. Because of the constant visitors, the animals have no fear of humans and, therefore, are an easy subject for the nature photographer.
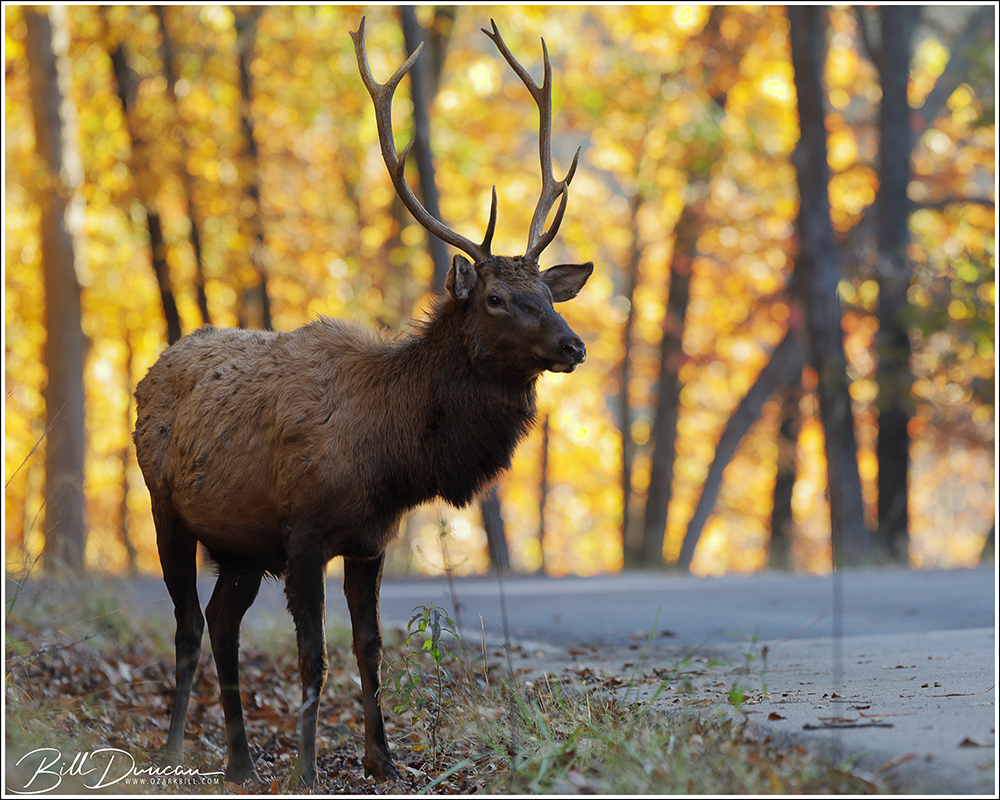
A “small satellite male” keeps to the outer boundary of the dominant bull’s area, hoping to find a stray cow.
Due to the cooperative nature of these subjects, a long telephoto lens, typically needed for wildlife photography is not required here. However, it is a good idea to give these animals their space and use common sense to keep the proper safe distance or remain in your vehicle while photographing here. Always be aware of your surroundings and photograph in a group when possible.
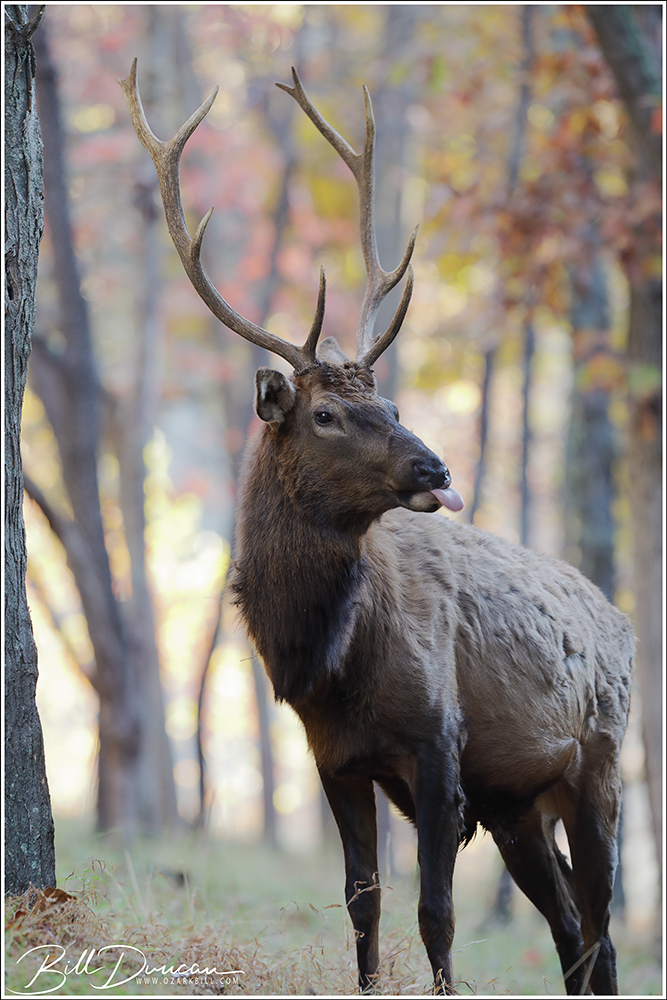
I recommend a mid-range telephoto focal length – a zoom lens in the neighborhood of 100-400 mm is an ideal choice. Depending on available light, a support like a tripod or monopod may be needed. However, with modern cameras and their ability to provide acceptable results at high sensitivities, handholding is usually a viable option.
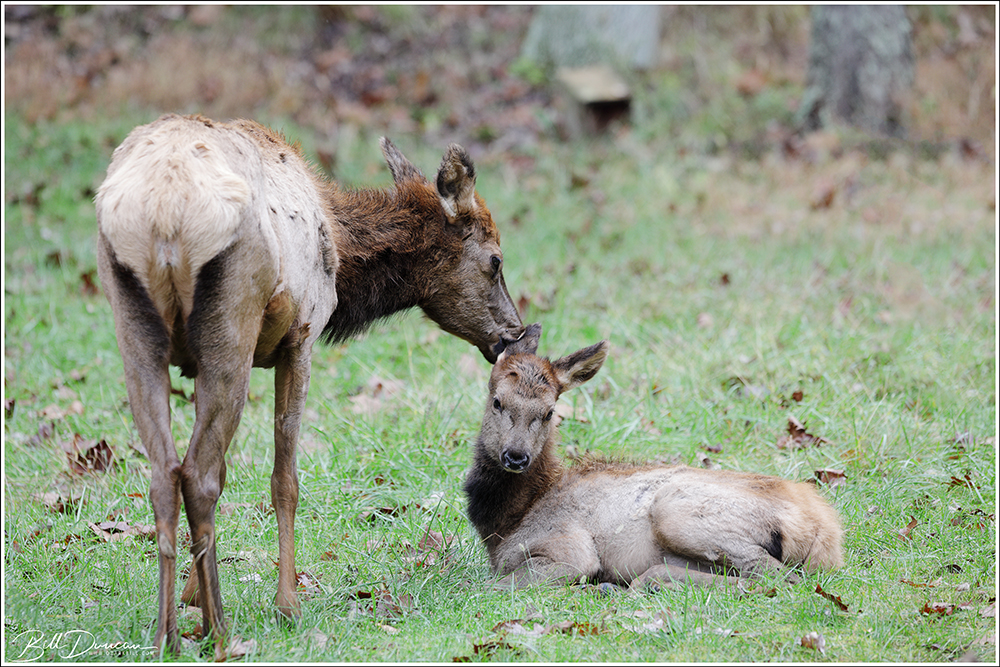
A mother cow gives her calf a reassuring muzzle nudge.
Because this is a nearby location, Lone Elk Park is a great spot to practice with wildlife while building a portfolio of a variety of images. Plan to visit during every season to include the greens of summer, the warm backgrounds associated with autumn and the snows (when available) of winter. Multiple visits will allow for photographing these animals at different life stages, such as when bull elk are in velvet in the summer or while bugling during the autumn rut. From time to time photographers have also been able to capture birthing of bison and elk and the subsequent play of the growing young. I hope to visit this location more frequently in the future.
Eastern Collared Lizard – female. 520 mm focal length equivalent, f/11, 1/160 sec. ISO-200
These photos were taken on a WGNSS Nature Photography Group field trip into the St. Francois Mountains in early June, 2019.
Eastern Collared Lizard – female. 520 mm focal length equivalent, f/8, 1/200 sec. ISO-160
Along with a couple of female eastern collared lizards, we found quite a few other herps of interest.
Eastern Collared Lizard – female. 406 mm focal length equivalent, f/6.3, 1/320 sec. ISO-200
These lizards are really great photographic subjects. They are relatively easy to photograph, allowing for watching while they bask in the sunlight of a clear day without much manipulation or interference necessary.
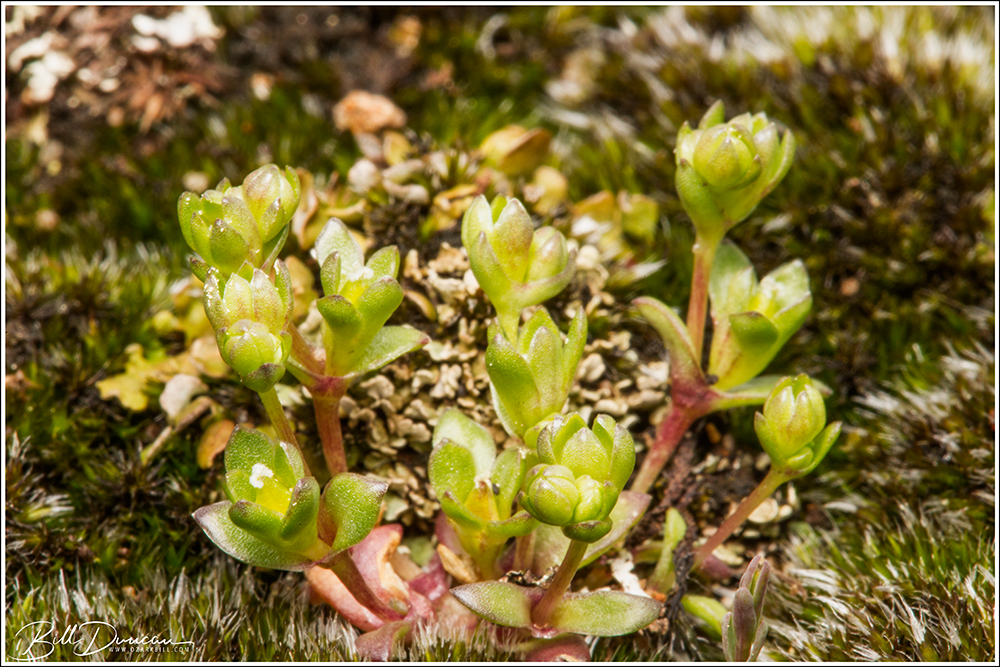
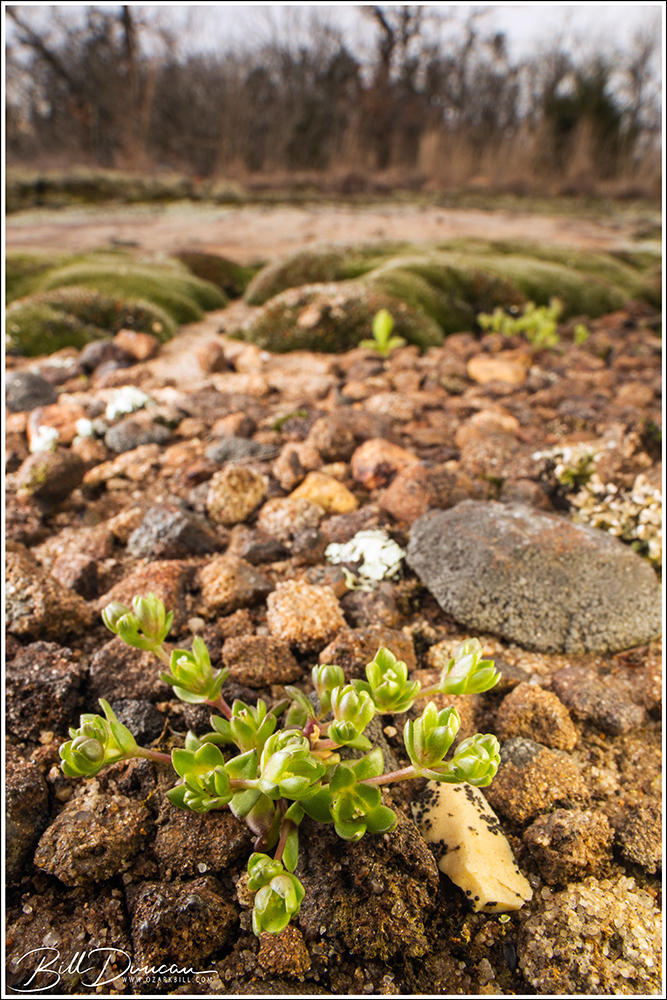
The WGNSS Nature Photography Group headed west early on a lovely day in early April with hopes of finding one of Missouri’s rarest plants – Geocarpon minimum, commonly referred to as tinytim, or earth-fruit. Geocarpon minimum (C=10) is a plant in a monotypic genus known for its diminutive size and rare status. It is listed as federally threatened and as endangered by the state of Missouri. The primary reason for its relative scarcity is its habitat needs; G. minimum requires sandstone glade habitats in Missouri as well as saline “slick spots” where it typically occurs in Arkansas, Louisiana and Texas. A fine balance must be the goal for managers of these areas. Competition and shading by native or exotic competitors is the primary limiting factor of this species and therefore, continuous disturbance is necessary for its continued success.
Geocarpon minimum “tinytim”
This plant’s life cycle is short, lasting only 3-6 weeks. Our objective was finding these plants in flower, but there were no guarantees we would find them flowering, or find them at all. Our first and primary hope for finding these plants was at Bona (pronounced Bonnie) Glade Natural Area. Here, our botany leaders, Casey Galvin, John Oliver, and Steve Turner showed us the microhabitat in which to find the plants and were able to point at the first few plants we found. With search images in mind, the group spread out and found the plants throughout the area. Better yet, we found the population in the early stages of flowering! As you can see in the accompanying photos, these are perfect subjects for the macro/micro lens.
In case you wondered how this species earned its name
After grabbing a late lunch together, a few of us decided to return to Bona Glade. Ted MacRae and I were unsatisfied with earlier images we had taken with our Laowa 15 mm macro lens and we were eager to improve the photos using this specialty lens that, when used successfully, can showcase the plant within its specific habitat.
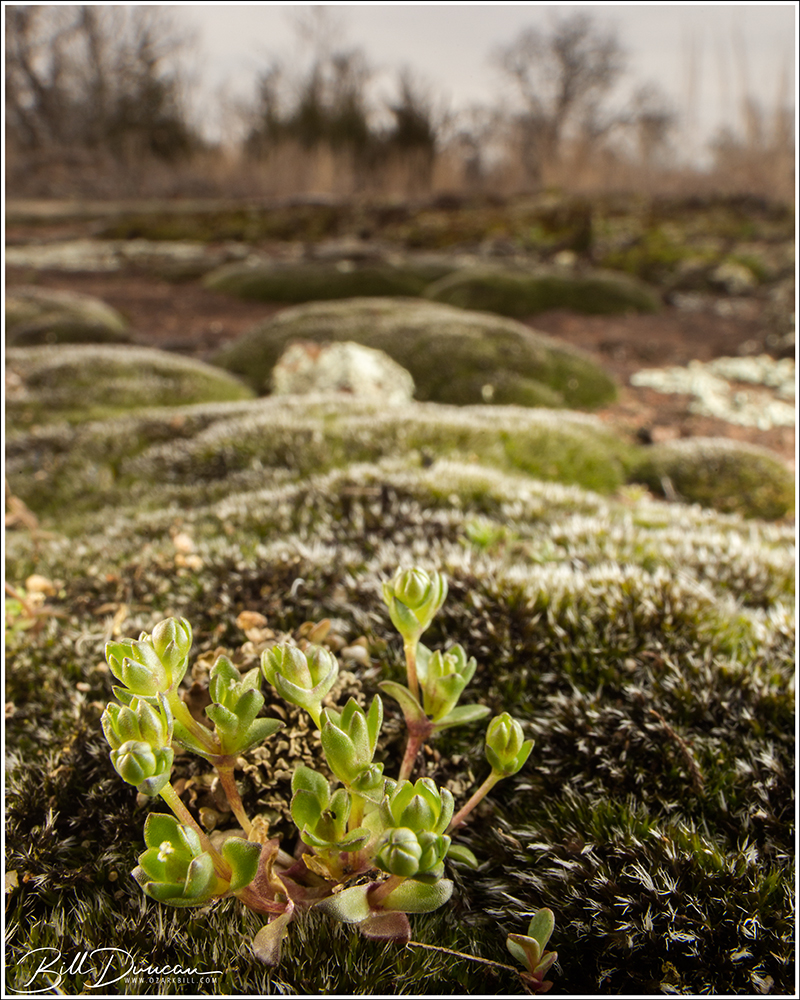
Geocarpon minimum growing from rock/sand substrate
We photographed the plant on the couple of substrates that we found it on and in the various stages of its development.
Geocarpon minimum growing from moss substrate
Ozark Bill getting low to meet Geocarpon at “eye level”. Photo by Ted MacRae
Finding and photographing this plant was a long-held goal of mine. It was a very special day spent with friends and newfound acquaintances. I am thankful for those who helped us find this plant and spent time with us. Hopefully future WGNSS members will continue to find tinytim in its Missouri homes for decades to come.
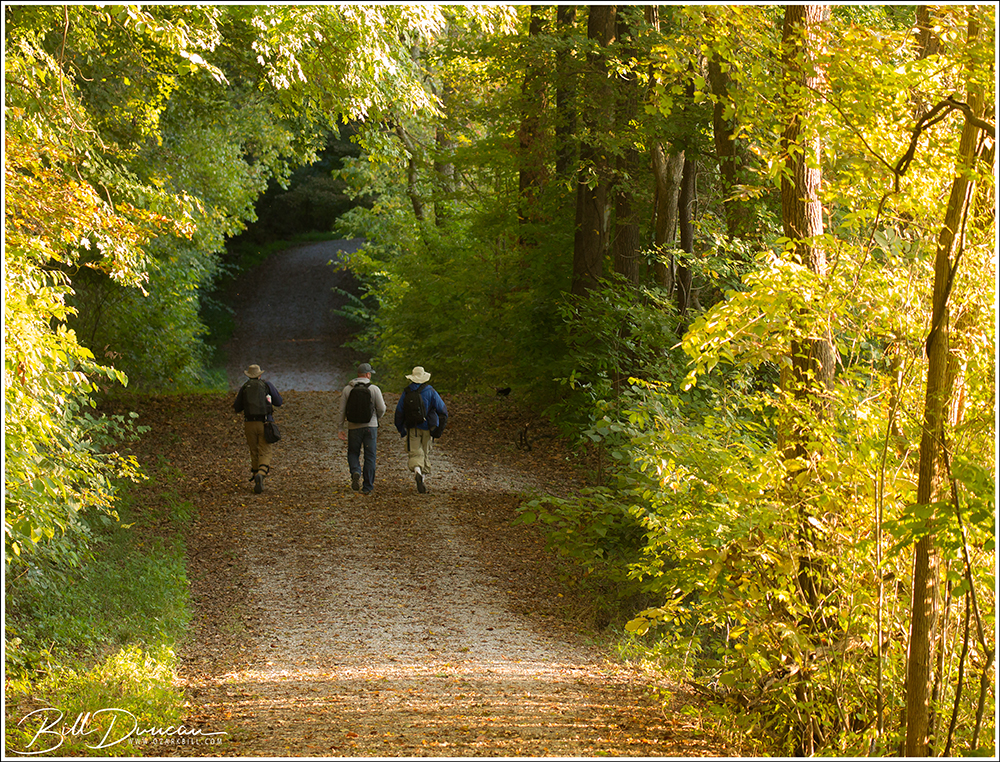
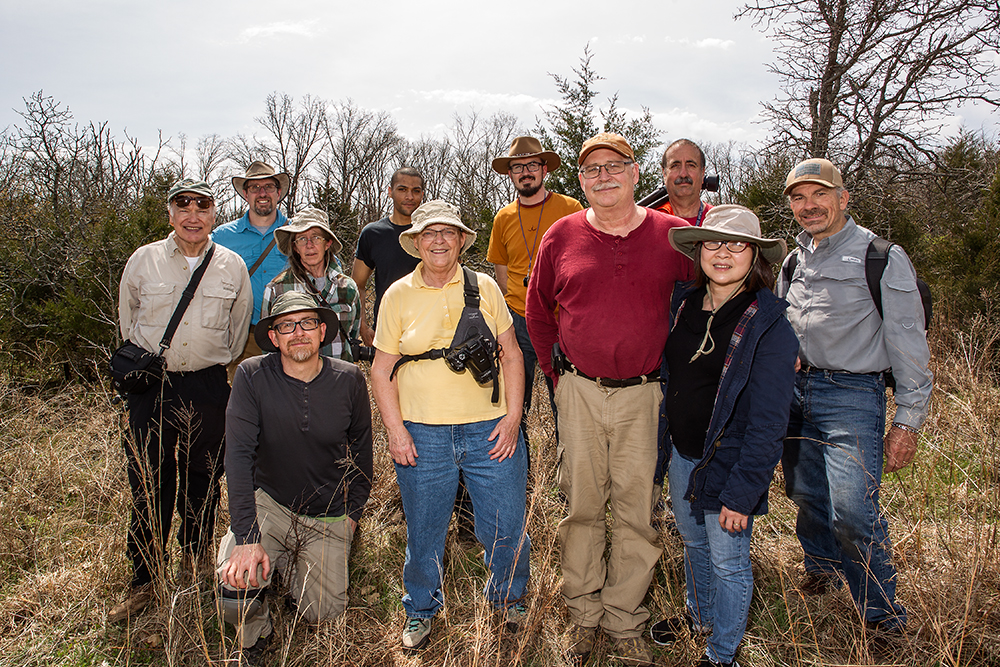
Tinytim hunters. From back row starting on left: John Oliver, David Seidensticker, Deb Tyler, Adam Rembert, James Faupel, Steve Turner, Front row starting on left: Bill Duncan, Evelyn Luecke, Casey Galvin, Anh do Galvin, Ted MacRae.
It’s been quite some time since I’ve shared a blog post. This has primarily been due to being in a residence move that is seemingly never going to end. But, I have been finding time here and there to make new images and even get some post-processing done. I have switched themes in this blog, picking a theme that should allow me to create a “portfolio” page to showcase my stronger photos. Unfortunately, I haven’t been able to figure out how to do this in WordPress. So I have not gotten far in this endeavor.
My goal is to post more frequently, just to share photos. There may not be a lot of accompanying text, but will depend on the subjects, my amount of free-time and my mood.
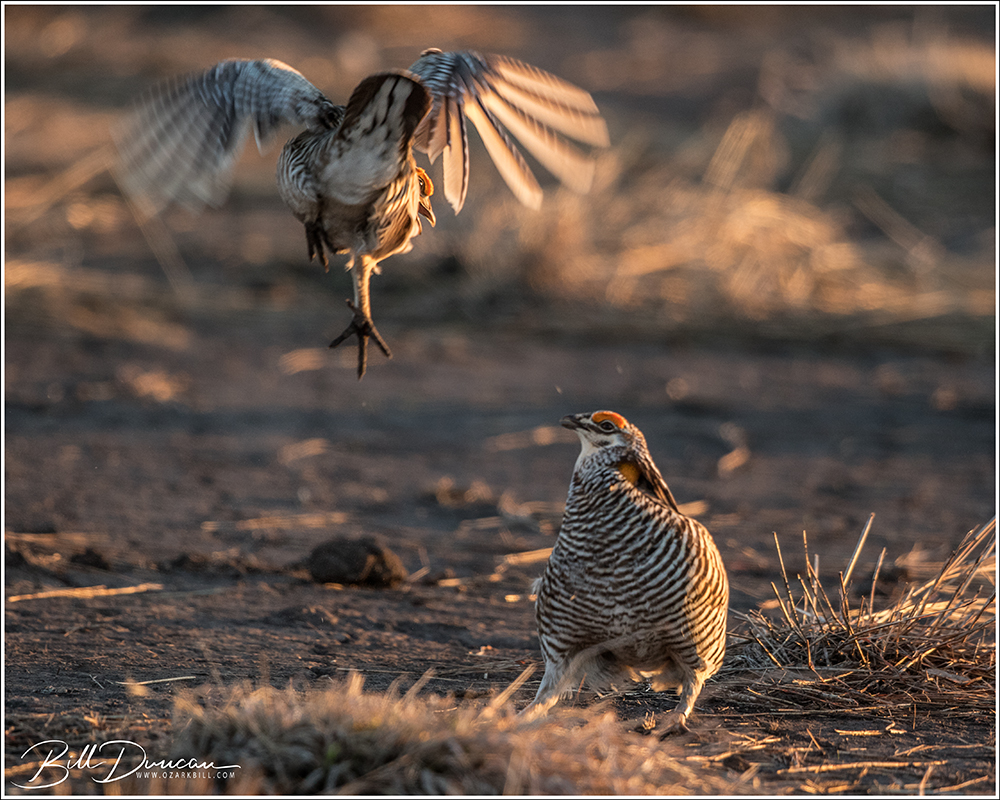
Greater Prairie Chicken in golden light
The images in this post were taken back in April of 2019 during a WGNSS Nature Photo Group outing to Dunn Ranch Prairie. This visit was close to the end of the lekking period and was the latest date that the MDC was keeping the blind open. This was different than our previous visit when we visited in the earlier part of the season and had pros and cons associated.
Boomer
Visiting the lek later in the season created better chances for better light (clear skies) and warmer weather. However, what we didn’t expect was that the females typically choose the dominant males to copulate with in the earlier days of the season and will often be nesting come the later days of the lekking season. This is what we had found during this visit. We did not see a single hen during this visit.
The standoff
Because there were no hens to compete for, the males had no heart for the competition. We had very few opportunities to photograph the action we had witnessed during our first visit to the lek two years prior.
One of the few opportunities to capture a fight between males
The light, however, was spectacular – we had no reason to complain and we all made memorable portrait style photos of these birds booming, dancing and cackling.
Never a disappointment, hopefully this Missouri population somehow continues to hang on so that WGNSS members can continue to enjoy this spectacle in Missouri.
ƒ/8, 1/1250 sec, ISO-320, 1120 mm focal length equivalent
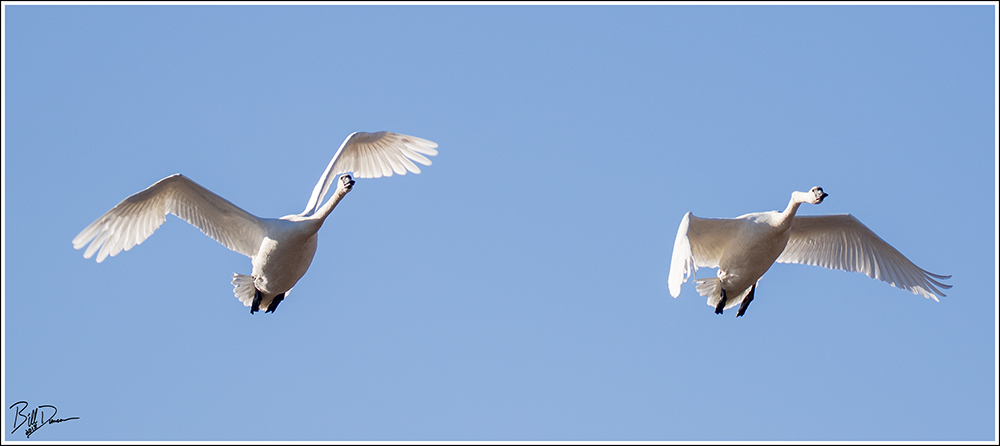
In December, 2018 the WGNSS Nature Photography Group met at Riverlands Migratory Bird Sanctuary with hopes of making some memorable images of our giant white residents that spend their winters here. Trumpeter and Tundra Swans will spend their evenings at roost in the bodies of water at RMBS and will then typically leave to forage in surrounding agricultural fields, picking up the wasted grain from harvest.
A good strategy for placing yourself in the most appropriate position for making photographs of these birds is to pay attention to the direction of the sun. If the birds are found in Ellis Bay during the golden hours of morning light (during winter in St. Louis, this can be up to three hours after sunrise), then getting close to the shore with the sun behind you can produce some satisfactory results. Try getting closer to the ground and shooting the birds from a low angle. This will give your photographs an eye-to-eye perspective that is a much more intimate view into the birds’ world. Shooting at low angles will also tend to provide a more pleasing, out-of-focus background to your subject that will cause the bird to appear to be larger than life. We photographed both species of swan as they lounged in Ellis Bay for the first couple hours of the morning. Can you pick which is the Tundra and which is the Trumpeter Swan in these first two images?
ƒ/8, 1/800 sec, ISO-250, 1120 mm focal length equivalent
We then moved on to another place within the refuge that the Swans can often be found on winter mornings. At Heron Pond, these birds are typically too far away from the observation areas to get closeup photographs while roosting. However, the patient photographer on the ready can often be rewarded by standing and waiting around. During this morning, the Swans were a tad tardy in lifting out of Heron Pond, so our group was in the right place at the right time. Getting proper positioning with the angle of the sun is a bit more difficult here in the morning but is still critical. We placed ourselves in the best places available on this busy morning and took advantage of the swans as they left the pond, which often flew right over our heads.
Photographing these mostly bright-white birds on a bright sunny day is not necessarily simple. While on the ground or the waters of the bay, it is common to have the camera’s light meter expose for the darker and more prominent background. This will often lead to the white feathers of the birds being overexposed. Remember to check the histogram of your camera and use the “blinkies” while reviewing your images to ensure you are not clipping your whites. If this is the case, make the proper adjustments to your exposure. Saving your whites may result in your blacks and shadows being bunched up at the other end of the histogram. Since the big white bird is your subject of concern, this should be nothing to worry about.
ƒ/5.6, 1/1600 sec, ISO-160, 594 mm focal length equivalent
Changing directions and the angle of sunlight are challenging for proper exposure. Get as close as you can in the field – much can be recovered in post-processing.
Shooting these large birds in flight presents a different set of challenges. Although these birds move relatively slower than most other birds during flight, the photographer will still want a relatively fast shutter speed. This is particularly true the closer you are to your subject. I recommend no slower than 1/1000 of a second. Start at this setting and increase shutter speed if you notice blurring or softness to your image due to subject movement. As these birds get closer during flight, they will naturally fill more of your frame, thereby increasing the number of pixels seeing the bright white values. This can often lead to a case of the camera’s meter overcompensating, thereby causing an underexposed image. In this case, the birds may come out looking grey instead of white and the black colorations of their feet and faces will be much too dark and lack sufficient details.
ƒ/5, 1600 sec, ISO-200, 272 mm focal length equivalent
In the above image, a swan can be seen with a significantly crooked neck. I typically see one or two birds with this condition every season. I do not know how it affects the birds or what their ultimate fates may be.
In the case of constant sunny skies, fully manual exposure settings are most called for. Here I will present a good starting point for setting the exposure for capturing swans in flight. Shutter speed – As I mentioned earlier, start with a minimum of 1/1000 sec. This may likely be too slow to capture a sharp image, depending on what position the bird’s wings were captured. Often, shutter speeds of up to 1/2500 sec or higher might be necessary. Aperture – This will depend on how close you are to the swan. Remember, these are large birds and when shooting at a profile there is a lot of distance from wingtip to wingtip. If the bird is significantly close, or if you have multiple birds in the frame, you will be unlikely to capture the entire subject(s) in critical focus if shooting wide open. I recommend no wider than ƒ/5.6 – you may need to stop down significantly smaller. However, always remember that getting the animal’s eye in sharp focus is critical. Many images will work fine if other parts of the bird are not in critical focus. ISO – Remembering that photography is a compromise, shooting at a fast shutter speed and smaller apertures might require that a higher ISO value be needed to obtain the proper exposure. Several latest digital camera models have a useful “auto ISO” setting. I know, technically this is not fully manual, but ISO does not necessarily have the input it once did. Know the highest ISO setting for your camera that you are comfortable with and don’t be afraid to shoot there. This will vary by camera model and by the photographer’s taste.
Here is a photo of “crooked neck” as it flew directly over my head. In cases like this a telephoto-zoom lens is really beneficial for capturing birds in flight.
ƒ/5, 1/1600 sec, ISO-400, 216 mm focal length equivalent
The majority of this material was originally published in Nature Notes (The Journal of the Webster Groves Nature Study Society) February 2019, Vol. 91, No. 2.